Benefits of a Solid Surface Sink

Benefits of a Solid Surface SinkWhen picking a new surface for your kitchen or bathroom sink, we highly recommend solid surfaces.  If you’re looking for a wide range of performance abilities, a selection of different looks and designs to choose from and a reasonable price tag, solid surface is simply very difficult to beat.  It is absolutely perfect for your next sink replacement.

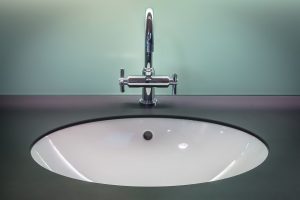
First of all, solid surface is seamless.  It can be integrated into your solid surface perfectly, without obvious seams, joints or other connections. The seamless joints look amazing, as your entire room ends up looking like one continuous piece, but this isn’t just a positive because it looks good.  No, the lack of seams and cracks means that your surfaces are much easier to clean.  You don’t get bacteria or mildew growth because there are no cracks and crannies for them to spread into.  That makes it an exceptionally hygienic option, especially compared to natural marble or other surfaces.

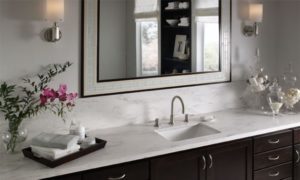
Secondly, you get a wider variety of colors and styles when you pick solid surface.  When you pick a natural sink material, your choices are generally limited to the natural colors of the rock.  Even materials like stainless steel just come in one basic color.  Solid surface, on the other hand, has an entire range of styles and colors to match any room’s requirements.  No matter what color or design scheme you’re planning on using, solid surface has a match for you.  Your customization options are drastically improved when you use solid surface.

Finally, solid surface is both durable and renewable.  Solid surface isn’t as fragile or brittle as porcelain or ceramic, making it less likely to break and scratch.  It is somewhat more likely to scratch than those materials, but that’s where solid surface’s real benefits shine.  Any stains or scratches can be buffed or sanded right out – solid surface is continuous, meaning the color and pattern stays the same throughout the entire depth of the material.  That makes any repair a very easy task.

Consider solid surface for your next sink!  You won’t be disappointed.

How to Restore a Solid Surface Sink

How to Restore a Solid Surface SinkDo you have a solid surface sink which has seen better days?  Something that looked spectacular when it was first installed, but over the years, has become dull and tarnished?  Have no fears – often, all a solid surface sink needs is a solid cleaning and some restoration work, rather than replacing the entire unit.  With a little elbow grease and a little know-how, you can get your sink looking great once again.

One of the benefits of solid surface is that it’s a non-porous surface, meaning that stains won’t penetrate deep into your sink or countertops.  However, regular abrasion from dishes, pots and pans can still occur, which can cause that smooth luster to dull and fade.   Thin, built-up layers of grime and gunk can also adhere to the roughened surface, further dulling its look.  Some simple maintenance, however, can get it back to looking spic and span once again.

Tools

For a basic restoration, you’ll want to gather some simple tools before you begin:

  • An abrasive cleaner with bleach, such as Comet.
  • A scrubbing sponge
  • An abrasive pad, if you’re in need of especially deep cleaning
  • A small plastic bristled brush

Cleaning Powder

After wetting the sink, take your cleaning powder and spread it liberally all over your sink basins.  You’ll want to leave it on the surface for a couple of hours.  That allows the bleach to have time to act on that caked-on food gunk, breaking it down and making it easier to clean.

After those few hours, you’ll want to scrub the sink down with the scrubbing sponge.  It’s a good idea to wear gloves during this part of the restoration; the chemicals involved aren’t necessarily dangerous, per se, but they really do a number on exposed skin.  For tighter areas around seams and drains, the scrub brush will probably be easier to use, and will help remove any residual staining.

Deep Scratch Repair

If you have any very deep scratches, simply using the cleaning powder will not be sufficient to restoring your sink.  At this point, you’ll want to break out the sandpaper.

One of the benefits of solid surface is that the pattern and color goes all the way through the countertop—it’s not just on the surface layer.  Therefore, many scratches can actually be sanded out without damaging the look of your sink.

Start with a 400-grit piece of sandpaper, and see if that works.  If the scratch remains, continue with more aggressive grits, even down to 60-grit.

The Toughest Scratches

If you’re an expert DYIer, you can handle even deeper scratches than that, though that’s a much more complicated process than simple cleaning and sanding.  An old rotary tool, equipped with an aluminum oxide bit, can be used to polish out deep scratches.  A diamond cutting wheel can be used to cut a deep groove right on the dark marks, which will remove the scratches but will require them to be filled back in again, using epoxy.

Final Steps

Once you’ve restored your sink, be it with cleansers, sandpaper or epoxy, it should look good as new again.  You can keep it looking newer for longer by regularly cleaning it with an abrasive cleaner and pad – it’s much easier to stay on top of cleaning regularly rather than making a major project out of it every few years.

Our trained professionals here can help you if you don’t feel confident dealing with the deepest scratches.  If you want the benefit of experienced contractors with years of experience, or simply need some more personalized advice on how to continue, please don’t hesitate to contact us.  We’re glad to help with the fabrication, installation and maintenance of solid surface material, and we promise to bring the absolute best experience to each and every one of our clients.